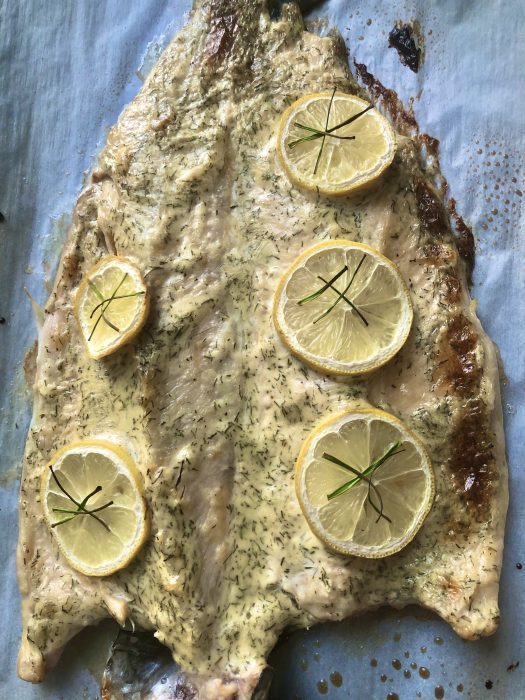
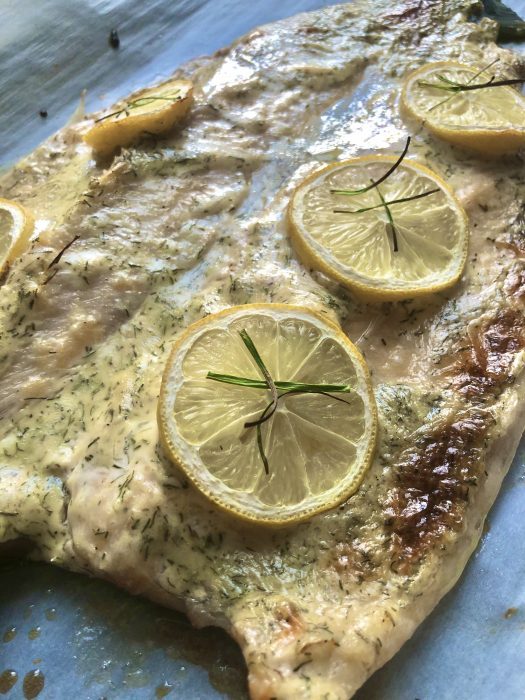
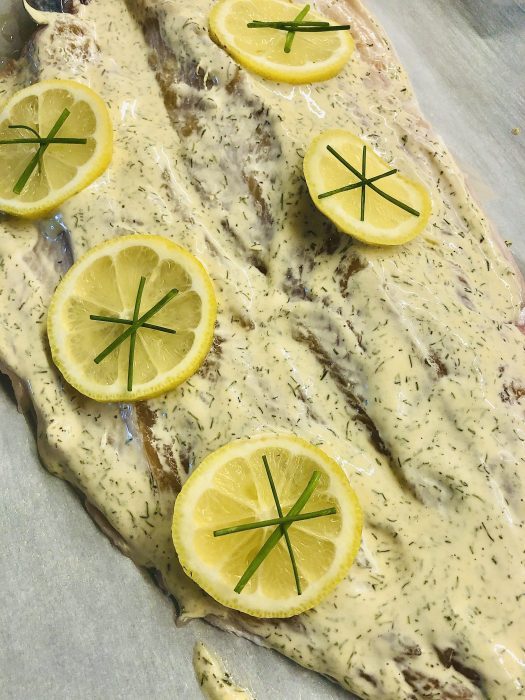
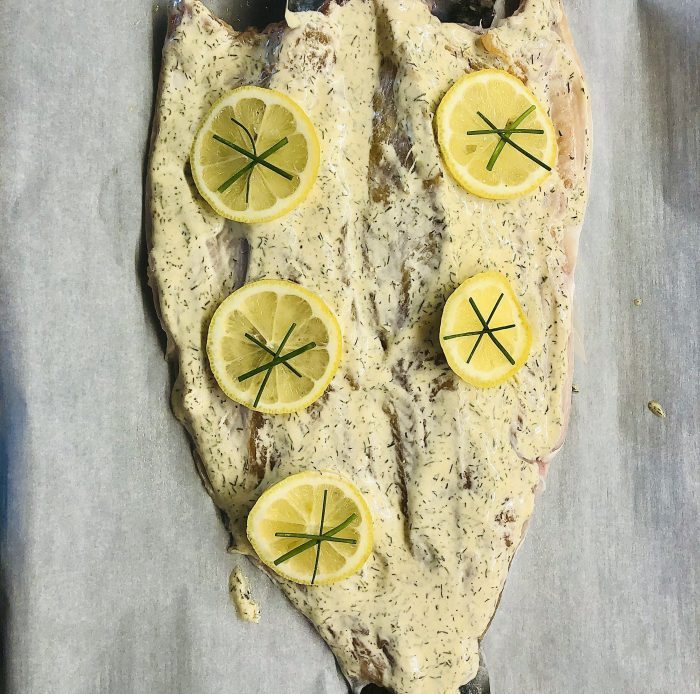
Heat Oven to 400°F. Line a baking sheet with parchment paper and spray with cooking spray. Dry the fish with paper towels and place the fish skin side down on the baking pan.
Whisk all ingredients except for lemon and chives and spread it all over the top of the fish. Out some lemon slices on top and garnish with chives. Roast for 15 min. Let sit for 5 min. Then serve with your favorite sides.
1/4 of Red, Yellow and Orange Bell Pepper, Chopped
8-10 oz. of Baby Bella or Cremini Mushrooms, sliced
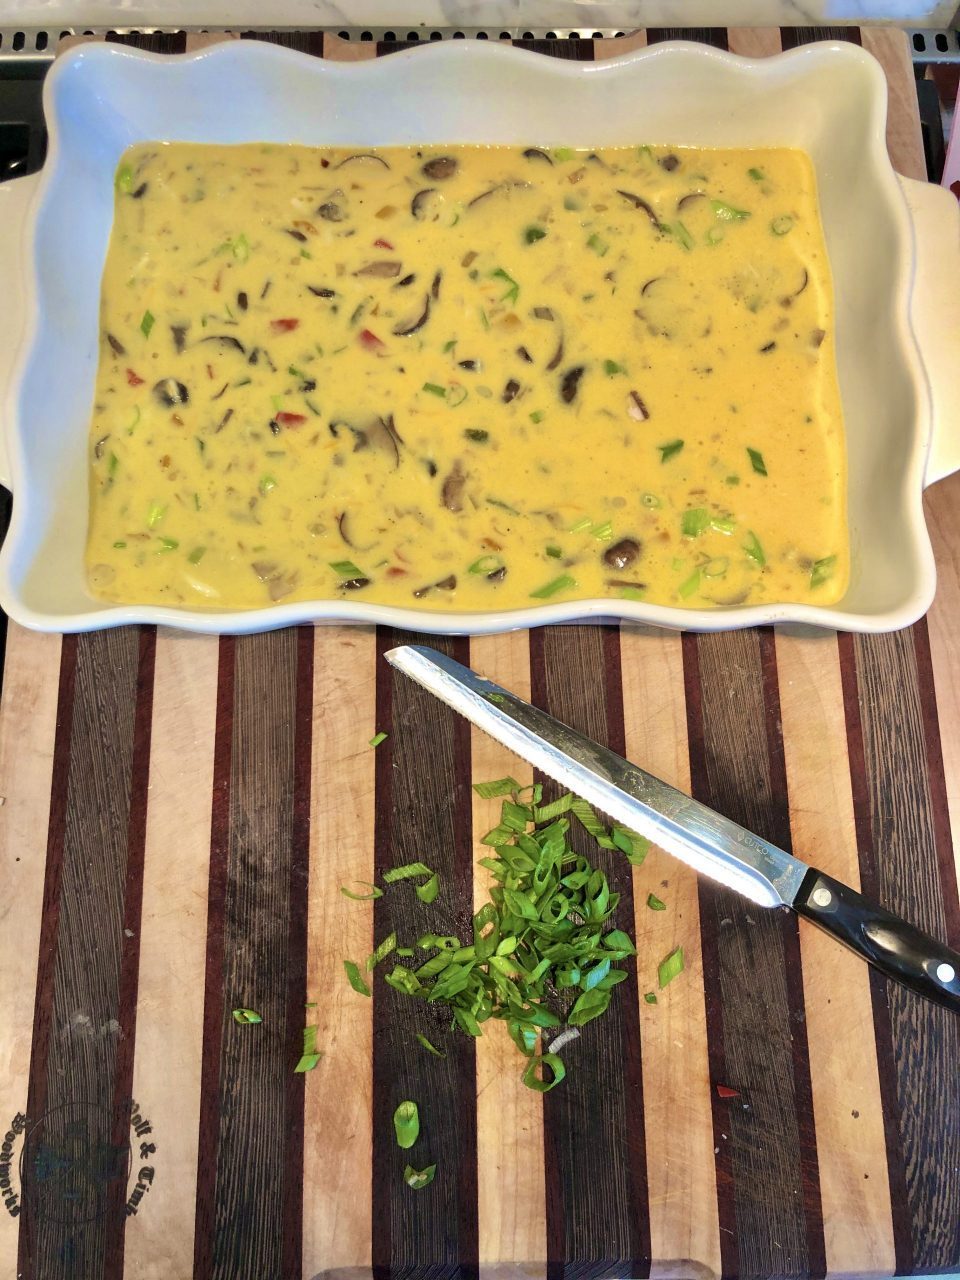
4 Large Scallions, sliced on an angle, divided
12 Large Eggs
1 Cup Half & Half
1/2 cup +2 Tbsp Shredded Sharp Cheddar
1/2 cup+2 Tbsp Shredded Mozzarella
3/4 tsp sea salt, divided
1/2 tsp Black Pepper
2 Tbsp unsalted Butter or Ghee
2 Tbsp Avocado Oil
12” Cast Iron or Nonstick Pan
13×9 Casserole Dish, greased with cooking spray
DIRECTIONS:
Heat oven to 375°F.
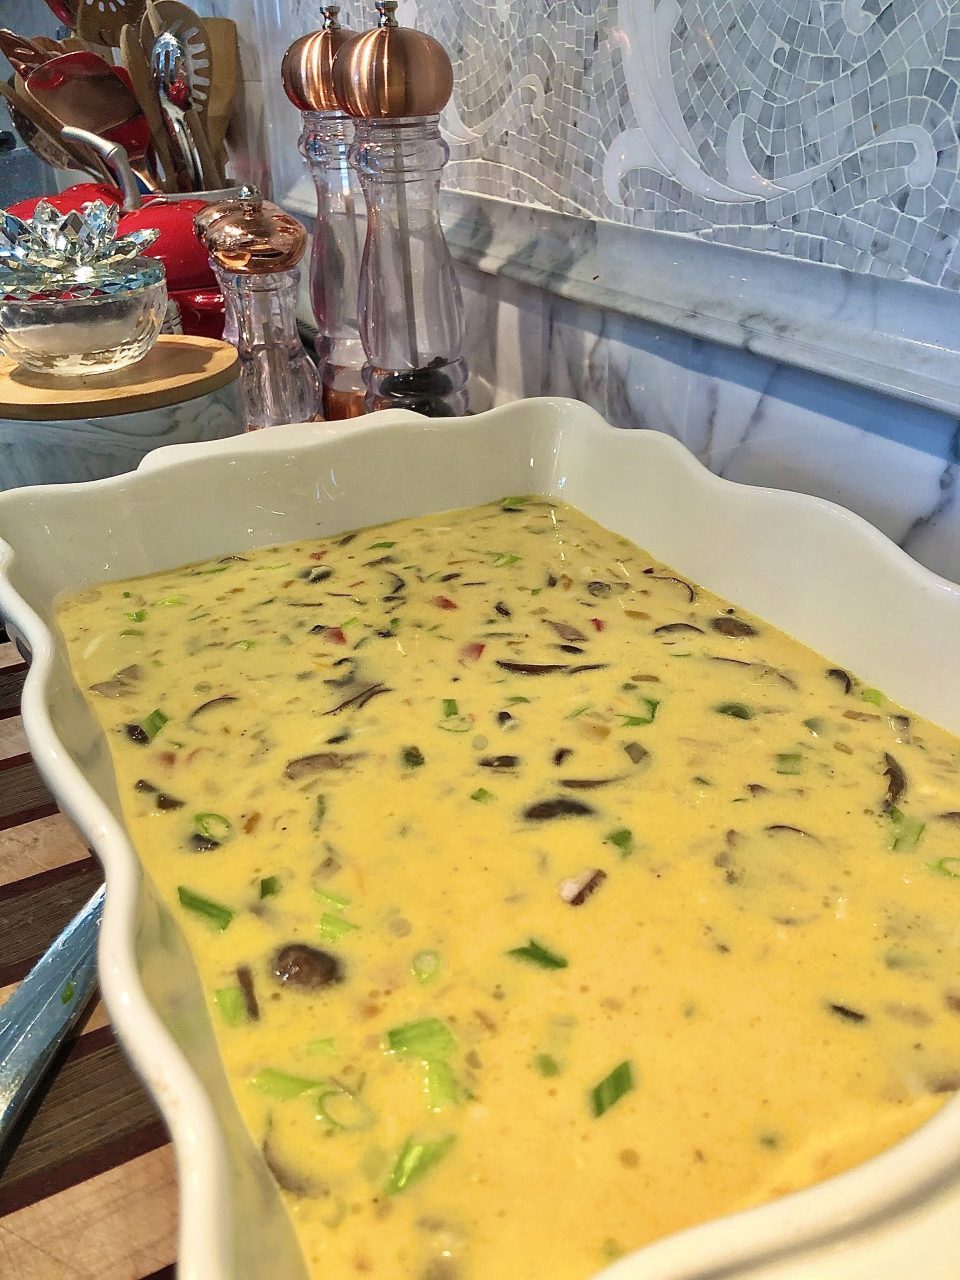
Heat pan very well. Add butter, oil, onions and 1/4 tsp salt. Sauté until soft, about 4 min. Add peppers and continue to sauté for another 3 min. Add mushrooms and another 1/4 tsp of salt and 1/4 tsp pepper. Sauté for 3-4 min until tender. Turn off heat and let cool.
In a large mixing bowl, beat eggs very well. Whisk in half & half, cheese, half of the chopped scallions and the rest of the salt and pepper. Add a third of the sautéed veggies at a time until all incorporated. Pour into casserole dish and bake for 20 min until almost set but still raw in the center. Sprinkle the rest of your 4 Tbsp of cheese and scallions. Bake an additional 10-15 min until cheese melts and eggs are set in the center.
Let cool for 5 minutes. Cut into 12 servings. Enjoy.
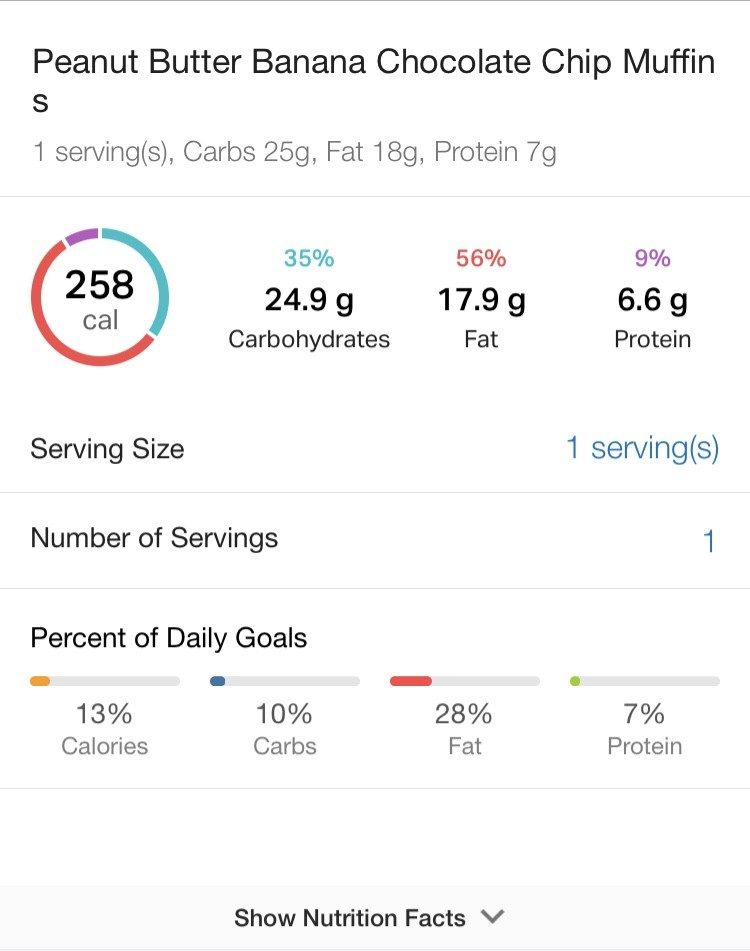
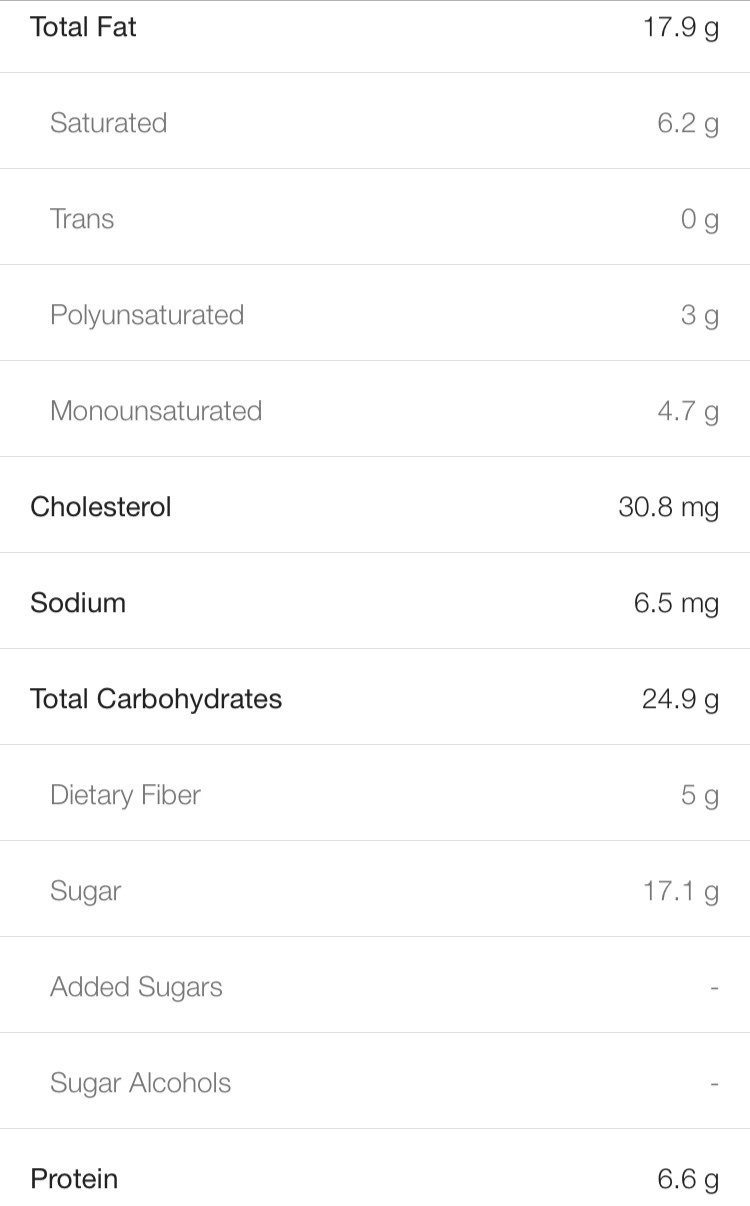
1 cup Creamy Peanut Butter (the kind with just peanuts in the ingredient list)
2 large eggs
1/4 cup 100% Maple Syrup
2 Tbsp Honey (can substituted for Maple syrup)
1/2 tsp baking soda
1 Tbsp Vanilla Bean Paste or Extract
1 cup Semi Sweet or Dark Chocolate Morsels
Food processor
DIRECTIONS:
Heat oven to 400°F. Grease a standard muffin tin with cooking spray and set aside.
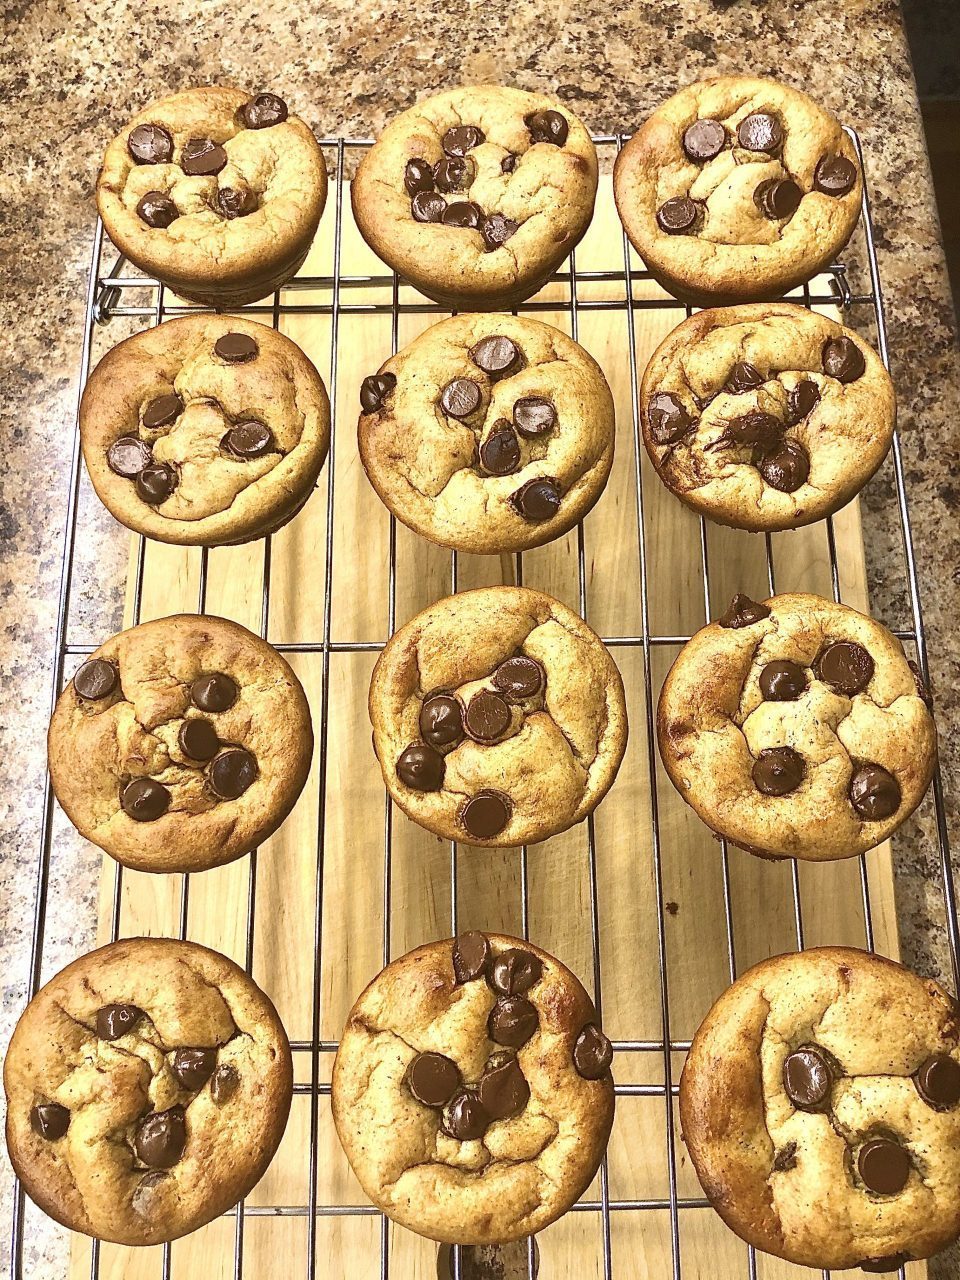
Add first 7 ingredients to your food processor and purée until smooth and creamy. Fold in the chocolate scraping down the sides to ensure that it’s fully incorporated.
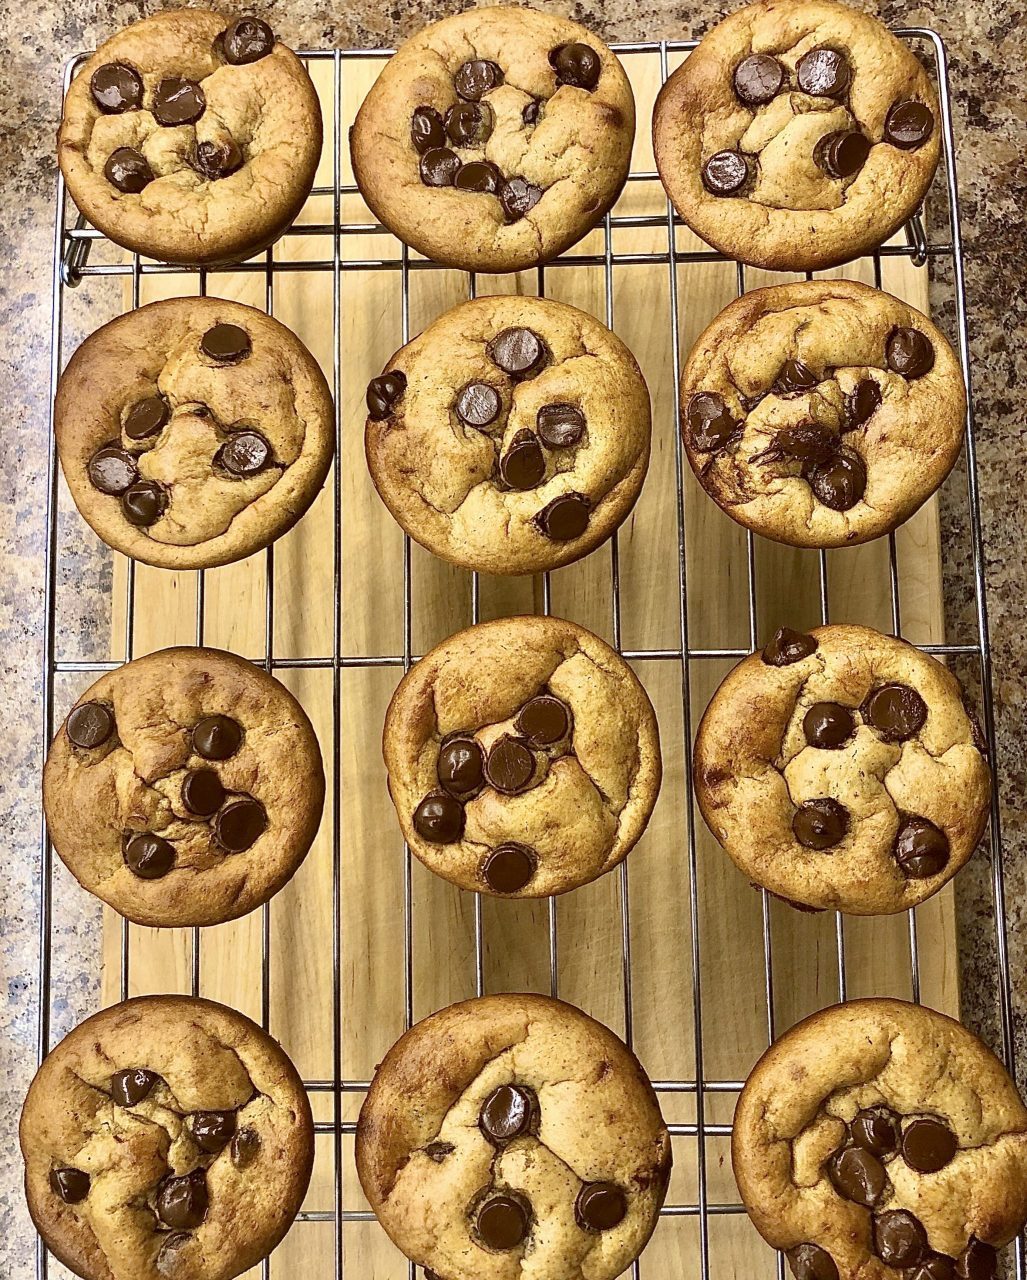
Using a cookie scoop distribute the batter evenly among the muffin cups. Add a few more chocolate chips on top. Bake at 12-15 min or until a tester comes out slightly a lean. I like to under bake them just a tad bit because they continue baking in the tin due to all the residual heat. Allow the muffins to cook for 10 min then transfer onto a cooking rack. They’re delicious when warm with all that oozing, yummy chocolate. Enjoy!
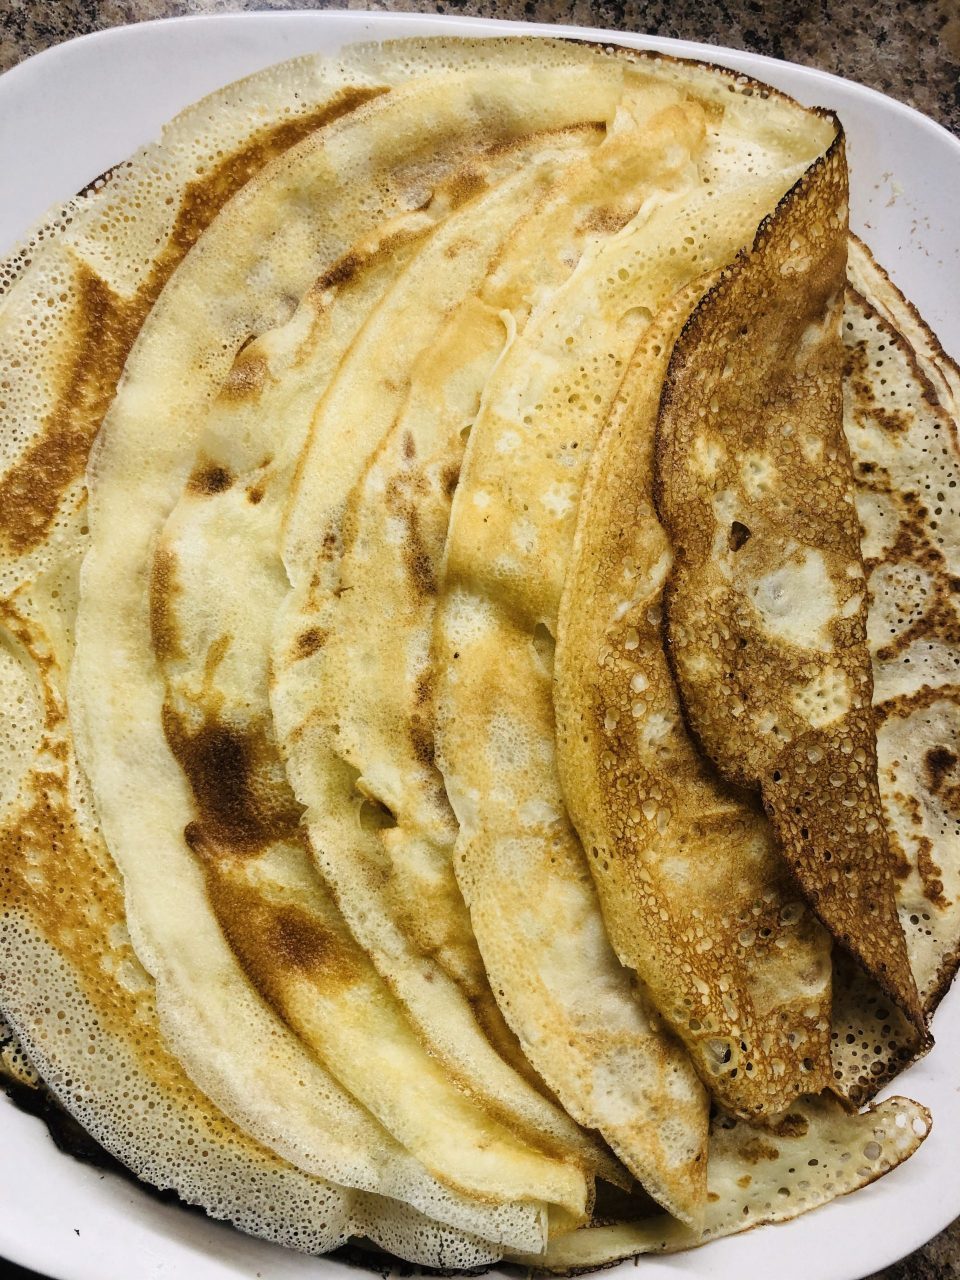
INGREDIENTS:
•4 Large Eggs
•2-3 Tbsp Cane Sugar (depending on how sweet you like your crepes)
•3 Tbsp Avocado Oil
•500ml Organic Whole Milk
•280g unbleached all purpose flou
•500ml Boiling water

DIRECTIONS:

In a large bowl, whisk eggs, sugar and oil until completely combined. Add milk and whisk again. Sift flour into egg mixture and whisk until incorporated well. Finally, add boiling water and whisk well.
Heat your crêpe pan(I use a 10”) on medium heat and grease with oil using a silicone brush. Pour about 1/3 cup batter onto pan and swirl it around to distribute evenly. Fry about a minute on each side. Repeat process until you have used all the batter. Makes about 24 crêpe.
If you have tried this recipe. Make sure to tag me in your posts or drop your comment/feedback below. Thank you!
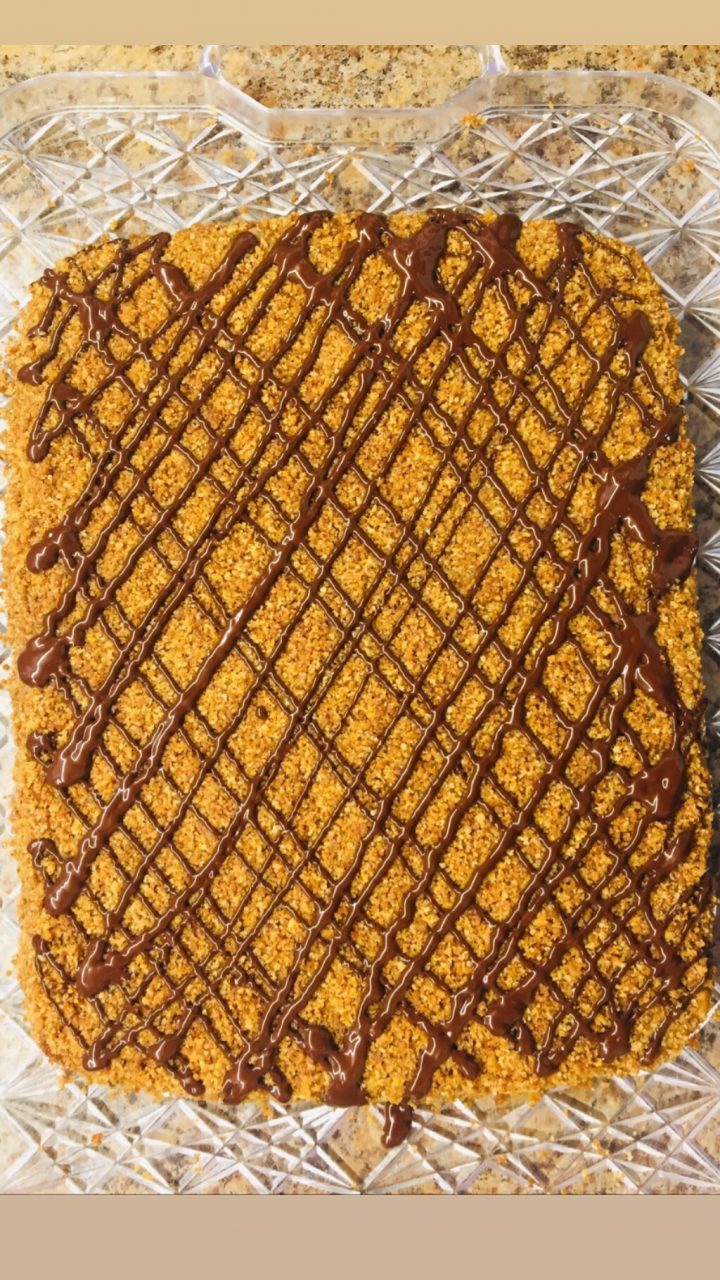
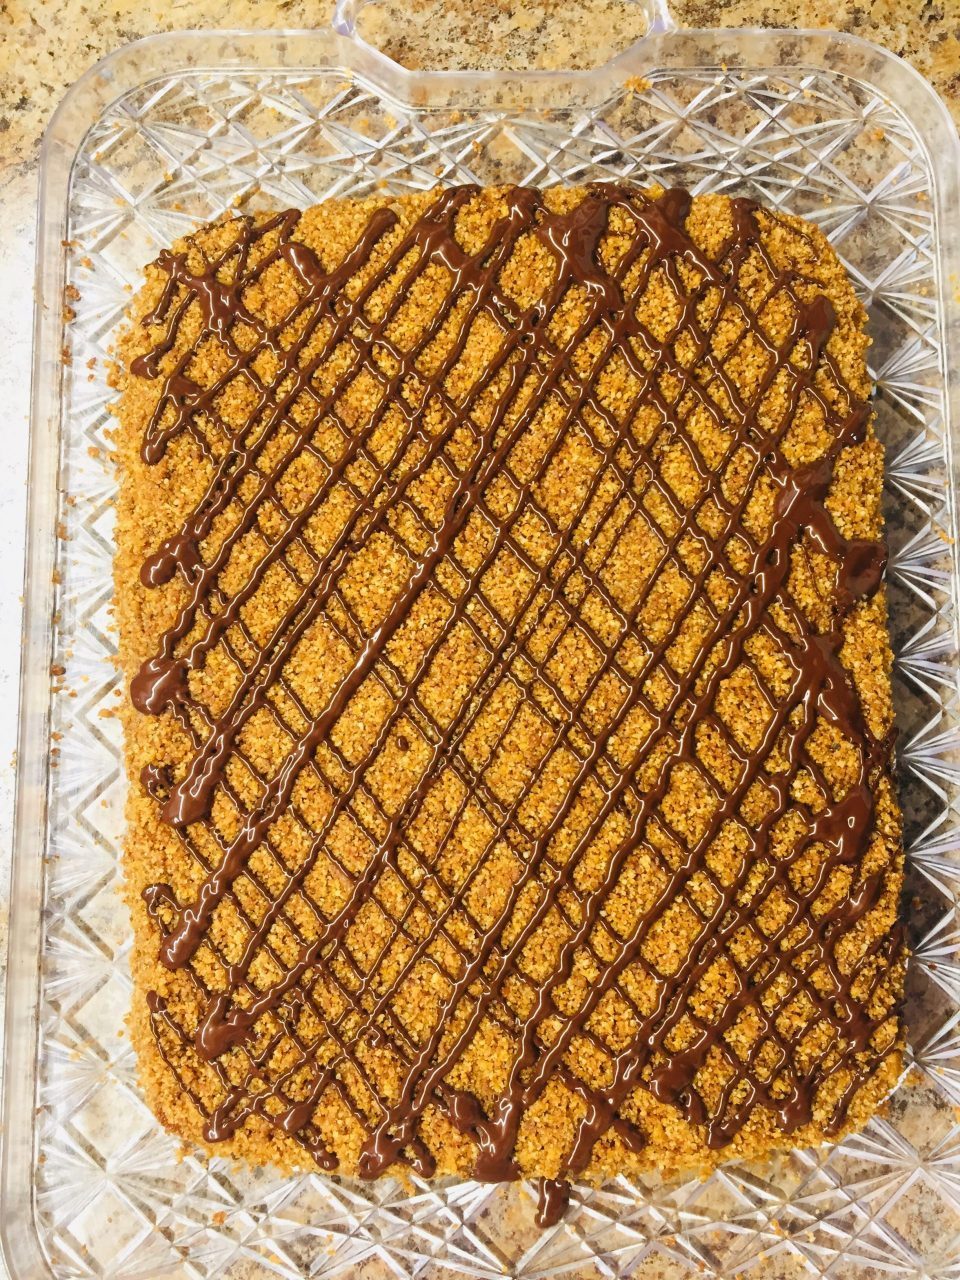
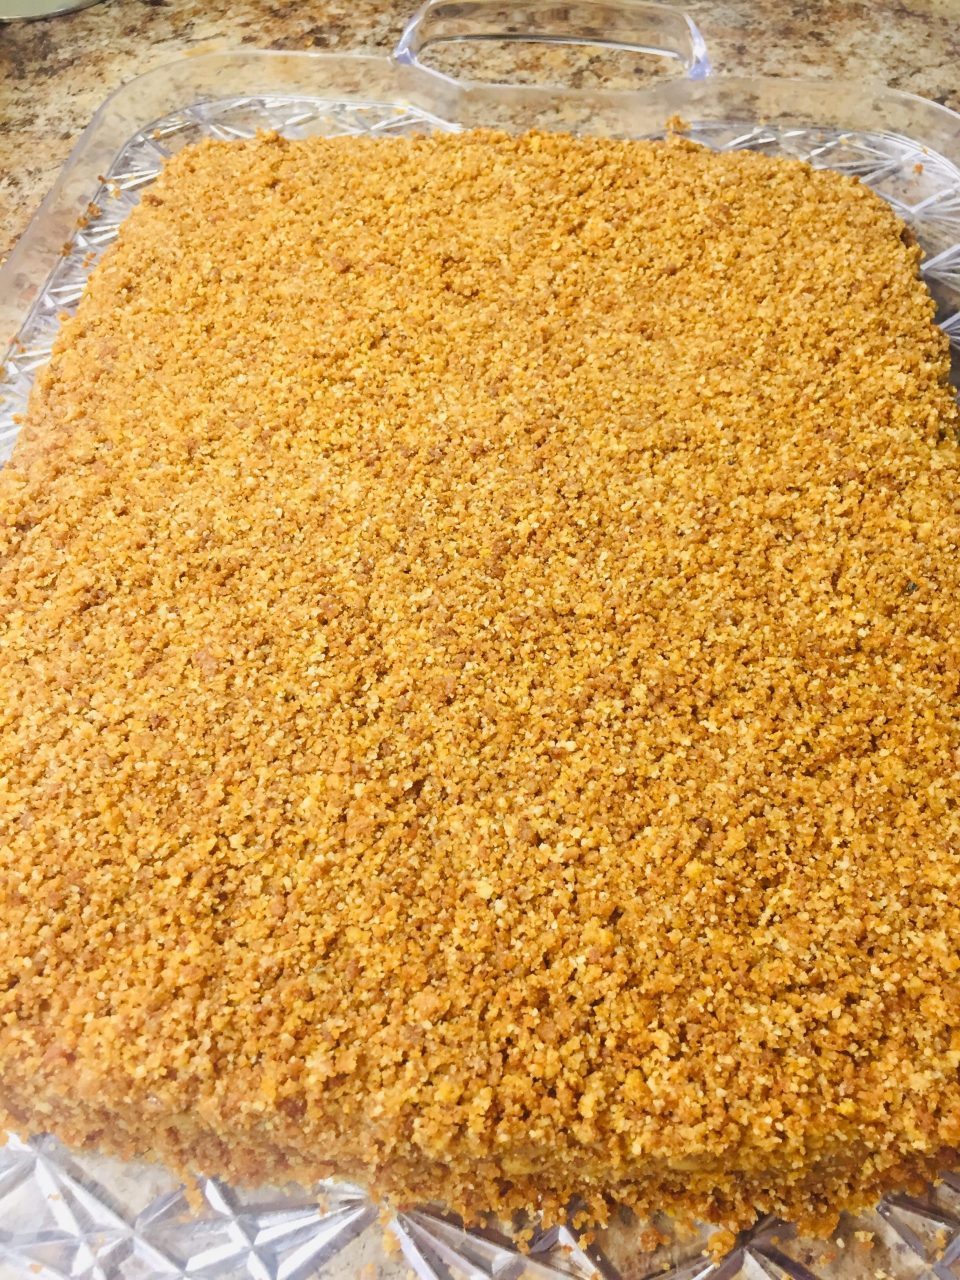
This Honey Cake is one of the most requested holiday desserts in our household. It originated in the 19th century in Russian Empire and has been popular in countries of the former Soviet Union ever since. It is a dessert which is known for its lengthy preparation time and is best made a couple of days in advance before serving. You may bring it completely to room temperature or serve it cold. It’s delicious both ways. It’s a honey flavored sponge cake with caramel cream filling topped with a nutty crumb. Absolutely decadent to say the least.
Serves: 20-25 people depending on the size of the pieces.
INGREDIENTS:
1 (14oz.) can Organic sweetened condensed milk (I get mine at Trader Joe’s) or you can buy pre-made caramel
2 -½ cups Organic Unbleached All Purpose Flour (King Arthur)
1 Tbsp Baking Soda
3 sticks of Organic Grass Fed Unsalted Butter, 1 stick at room temperature (for caramel cream)
¼ cup Organic Clover or Wildflower Honey
3 Large Organic Eggs (I use Pete & Gerry’s)
1 ½ cups Organic Evaporated Cane sugar
1 cup Organic Walnuts
1/2 10 oz. Bag of Enjoy Life Dark Chocolate chips for drizzle
Parchment Paper
Pencil
Off-set Spatula
13 x 9 cutting board
Hand Mixer
DIRECTIONS:
Boil your condensed milk submerged in water for 2 hours. ** (see note) Let cool completely. Beat the cooled caramel with 1 stick of butter. Set aside.
Sift your flour along with the baking soda and set aside.
On your parchment paper, trace the shape of your cake with a pencil. I used a 9×13 cutting board with rounded edges. I had enough dough for 4 layers. Therefore I traced four sheets of parchment paper.
Heat oven to 350°F. In a large Pyrex bowl set over a double boiler, melt 2 sticks of butter over medium heat. Whisk in honey until completely combined. Using a hand mixer beat in your eggs one at a time until incorporated . Now add your sugar and beat again for about a minute or so. Now add your flour/soda mixture. Beat until completely incorporated and creamy. Remove the bowl from the double boiler and set on a trivet or kitchen towel. Measure out 1 cup of dough and put it on your parchment paper. Using an off-set spatula spread evenly going just over the edges that you traced. It’s not supposed to be perfect because you will trim the layers after they bake again with the cutting board over it. Continue with the rest of the dough until you have 4 parchment papers ready with the dough to be baked. Bake for 5-6 min. Cool completely.
Use the same board you used to trace the parchment paper. Put it over each cookie layer and trace again except this time cut with a paring knife. Separate the edges and put them all into a food processor with walnuts continuing to do the same with the rest of the layers.
Now place the first layer on your serving plate. Start spreading the cream filling with the offset spatula. Try to distribute the cream as even as possible. Continue with the rest of the layer until you have used up the cream filling at the top of the last layer and the sides. Using the crumb-walnut mixture, spread some over the top of the cake and sides. Melt your chocolate, transfer to a sandwich bag and cut off a tiny corner and drizzle over the top. Let the chocolate set. Cover with plastic wrap and refrigerate for 2 days.
1.5 Cups Organic Vegan Shortening (I use Spectrum Organics)
1 Cup Unbleached All Purpose Flour (I use King Arthur Flour)
1 Cup White Whole Wheat Flour (I use King Arthur Flour)
8 oz. Almond Paste (I use Solo )
1 Cup Coconut Sugar (I use Madhava)
4 Large Eggs, Room Temperature, Separated (Pete & Gerry’s Organic)
1/2 tsp Almond Extract (I use Flavorganics)
1/2 tsp salt ( I use Himalayan salt)
Red and Green Plant Based Food Coloring (I use Color Garden Dyes Holiday Pack)
1/2 Cup Organic Apricot Preserve (I use Trader Joe’s)
1/2 Cup Organic Seedless Raspberry Preserve (I used Trader Joe’s)
1/2 a package of 10oz. bag of Enjoy Life Semi Sweet Chocolate Chips
1/3 bar of 100% Cacao Baking bar (I use Dagoba Organic)
1 Tbsp Vegan Shortening
Cooking Spray
3- 9” x 13” x 0.75” non-stick pans
Off-Set Spatula
food processor
Parchment Paper
Cooling Rack
DIRECTIONS:
1.Prep. First, position racks in the upper and lower thirds of the oven; preheat to 350 degrees F. Spray the pans with cooking spray and lay parchment paper in each one.
2.Make the batter. Put your almond paste in a food processor to get it finely crumbled. In a stand mixer fitted with the paddle attachment, combine the almond paste, sugar, and the shortening. Beat on medium speed until combined. Beat in the egg yolks, one at a time, and extract and until smooth . Add flour and salt and beat until just combined. In a clean bowl, using a hand mixer, whisk the egg whites on low-medium until stiff peaks form. Fold about one-third of the egg white mixture into the batter with a rubber spatula, then gently fold in the rest.
3.Color the batter. Divide the batter evenly among 3 bowls. I used a digital kitchen scale. Stir enough red and green food coloring in 2 of the bowls to create a red and green batter. Leave the third bowl uncolored.
4.Bake the layers. Transfer the batter to the prepared pans (one pan for each color). Dip an offset spatula in water and spread the batter to the edge of each pan, smoothing the tops (the layer of batter will be very thin). Bake for about 8 to 10 minutes. Let cool completely in the pans on wire racks.
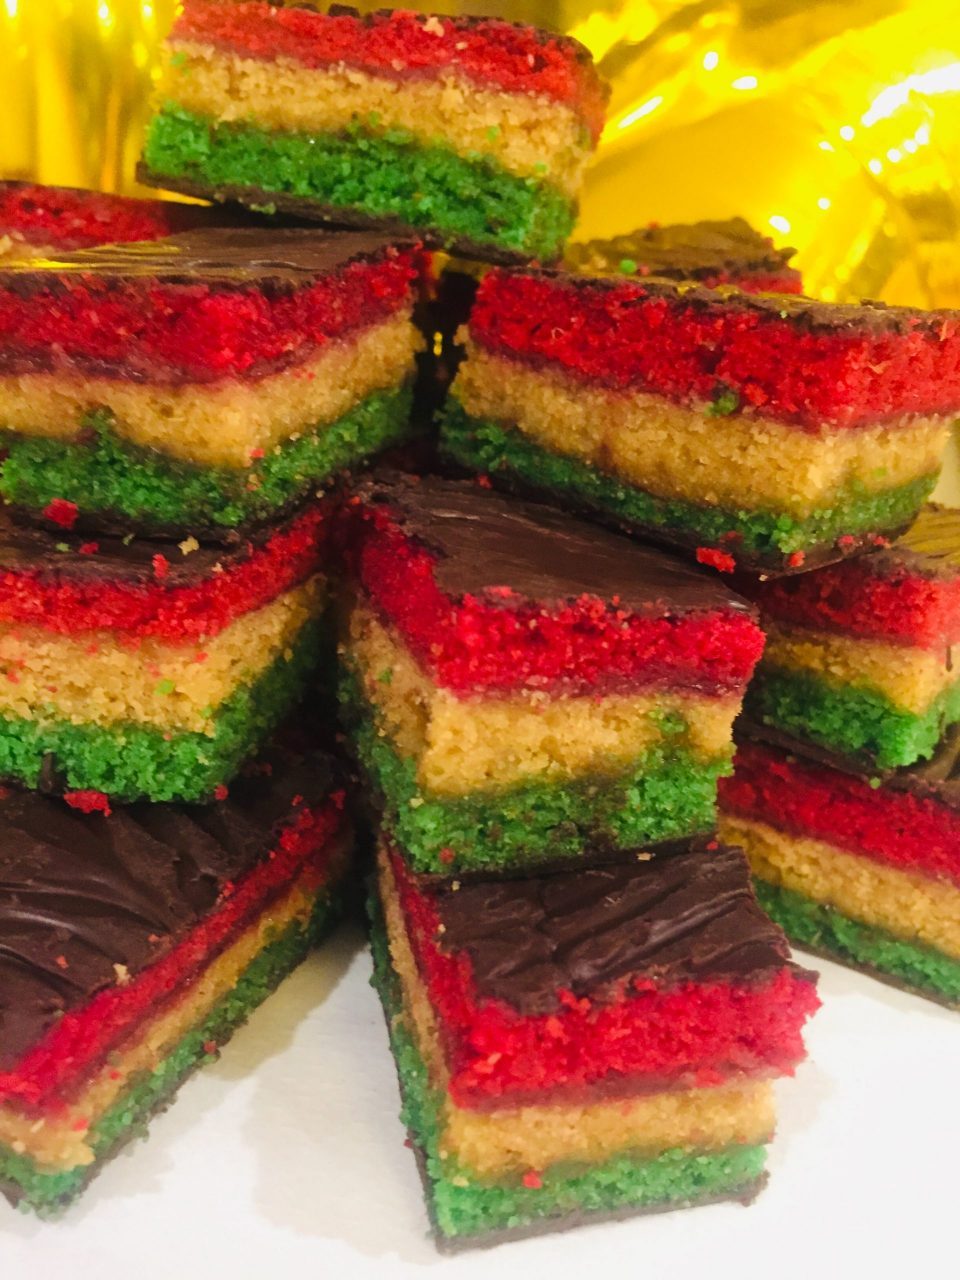
5.Assemble the layers. Remove the green layer onto a large cutting board. If your preserves are a bit hard, heat it up until it is somewhat liquefied. Spread the raspberry jam evenly on top of it (use as much as is needed to make a thin layer). Remove the plain cake layer by inverting it onto the green layer. Peel off the parchment paper. Spread the apricot jam on top of the plain layer. Remove the red cake layer by inverting on top of the plain layer. Peel off the parchment paper.
6.Trim the cake. Trim the sides with a serrated knife to make straight edges. Set a cooling rack over a baking sheet. Carefully slide the cake onto the rack, using a wide offset spatula to help you, if necessary.
7.Cover in chocolate. Melt the chocolate (preferably in a double boiler) and pour over the cake. Use an offset spatula to spread and smooth the chocolate on the top. Allow the chocolate to cool for 45 min. Flip the cookie to the other side and pour the rest of the melted chocolate. Let set slightly for about 15-20 minutes. Scrape wavy lines into the chocolate with a fork. If the lines in the chocolate don’t hold their shape, let the chocolate set a little longer and try again.
8.Cut the cake. Slide the cake back onto the cutting board. Cut the cake into 1”x 1.5” squares. Slice crosswise into strips, and then cut each strip into rectangular pieces. For clean edges, dip the knife in warm water and wipe it with a paper towel in between cuts.
10.Store in an airtight container. Your cookies will stay fresh in a tight container at room temperature or in the fridge for up to 1 week, but it’s doubtful these tasty gems will last that long.
1/4 cup Sweet Onion (quarter of a large onion or half of a small), finely grated
2 Large Eggs, beaten
6-8 Tbsp Flour (I use white whole wheat)
1 tsp baking powder
1/4 tsp turmeric
1 tsp salt
1/2 tsp finely ground black pepper
Avocado or Peanut Oil for frying
SAUCE:
1/3 cup Mayonnaise
2 cloves Garlic, minced
3 Tbsp finely chopped Fresh Dill
1 Tbsp Chives, finely chopped
1 Lime, squeezed
Salt and Pepper to taste
1/4 tsp Trader Joe’s Onion Salt
Compari Tomatoes, cut in half and sliced for garnish as pictured
Fresh cilantro leaves, for garnish
DIRECTIONS:
In a large bowl, mix together zucchini, onion, and eggs. Stir in 6 tablespoons of flour, baking powder, salt and pepper. If the batter is too thin from the zucchini, add another 2 tbsp of flour.
In a 10” saute pan over medium heat 1 tbsp of oil. Drop about 1/2 cup of batter and spread it out evenly into a 6” pancake. Lower the heat to medium-low and cook on each side for about 2-3 min. until golden brown. Continue with the rest of the batter until you have 3-4 pancakes.
In a small bowl, combine all sauce ingredients. Spread about a 1-1/2 Tbsp on each pancake leaving an inch border. Garnish with tomatoes and some cilantro leaves. Pre-slice before serving. Enjoy!
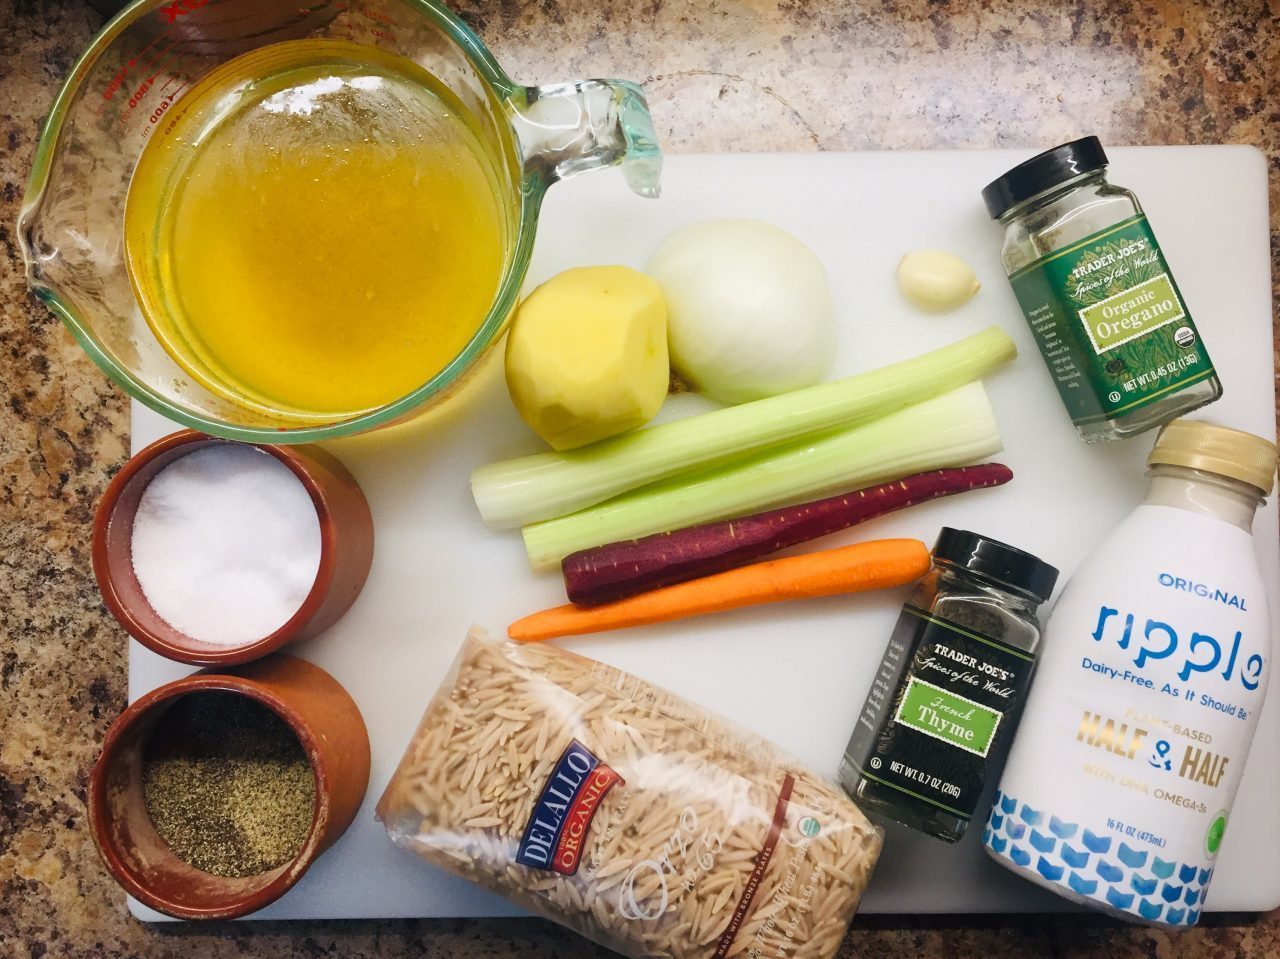
2 chicken breast halves, poached or roasted with italian seasonings
1 cup Ripple Original Half & Half
1/2 cup Delallo Organic Whole Wheat Orzo
DIRECTIONS:
In a medium pot, heat oil and sauté onions, carrots, celery and garlic on medium heat for about 7 min until soft. Add flour and seasonings. Stir and cook for about 2 min.
Add chicken broth and potato. Bring to a boil. Cover partially and simmer on low for about 25 minutes. Add chicken, half & half and orzo. Taste soup and see if you need to add any seasonings. Bring to a boil again. Cover and simmer for another 10 min until orzo is al dente and soup has thickened. Enjoy!
*Leftovers can be stored in the fridge for up to a week. You may always add more broth to the soup if you feel like it’s too thick after sitting in the fridge, since the noodles and potato soak up liquid the more they sit.
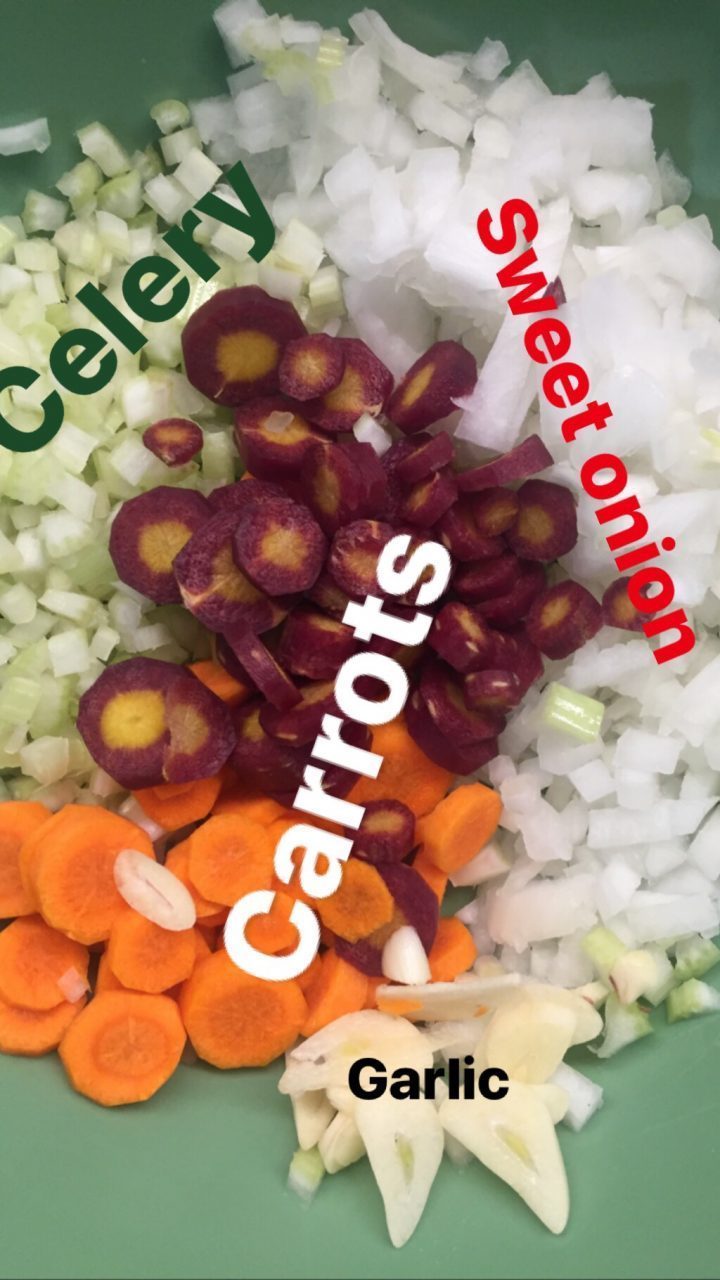
3/4 Cup diced fresh Shiitake mushrooms (trim stem)
1/4 cup fresh cilantro, finely chopped
3 scallions thinly sliced (white and green parts)
3 cloves garlic, minced
2 Tbsp Reduced Sodium Soy Sauce or Coconut Aminos
1 Tbsp Toasted Sesame Oil
1 Tbsp Ginger paste
1 Tbsp Rice Vinegar
1/2 tsp finely ground black pepper
1/4 tsp red pepper flakes (optional)
36 Twin Marquis SpinachSquare Wonton Wrappers
1/4 cup Avocado or Peanut Oil, divided
Small glass bowl with water
Pastry Brush
DIRECTIONS:
In a large bowl, combine chicken, mushrooms, cilantro, green onions, garlic, soy sauce, sesame oil, ginger, rice wine vinegar, pepper and red pepper flakes, if using.*
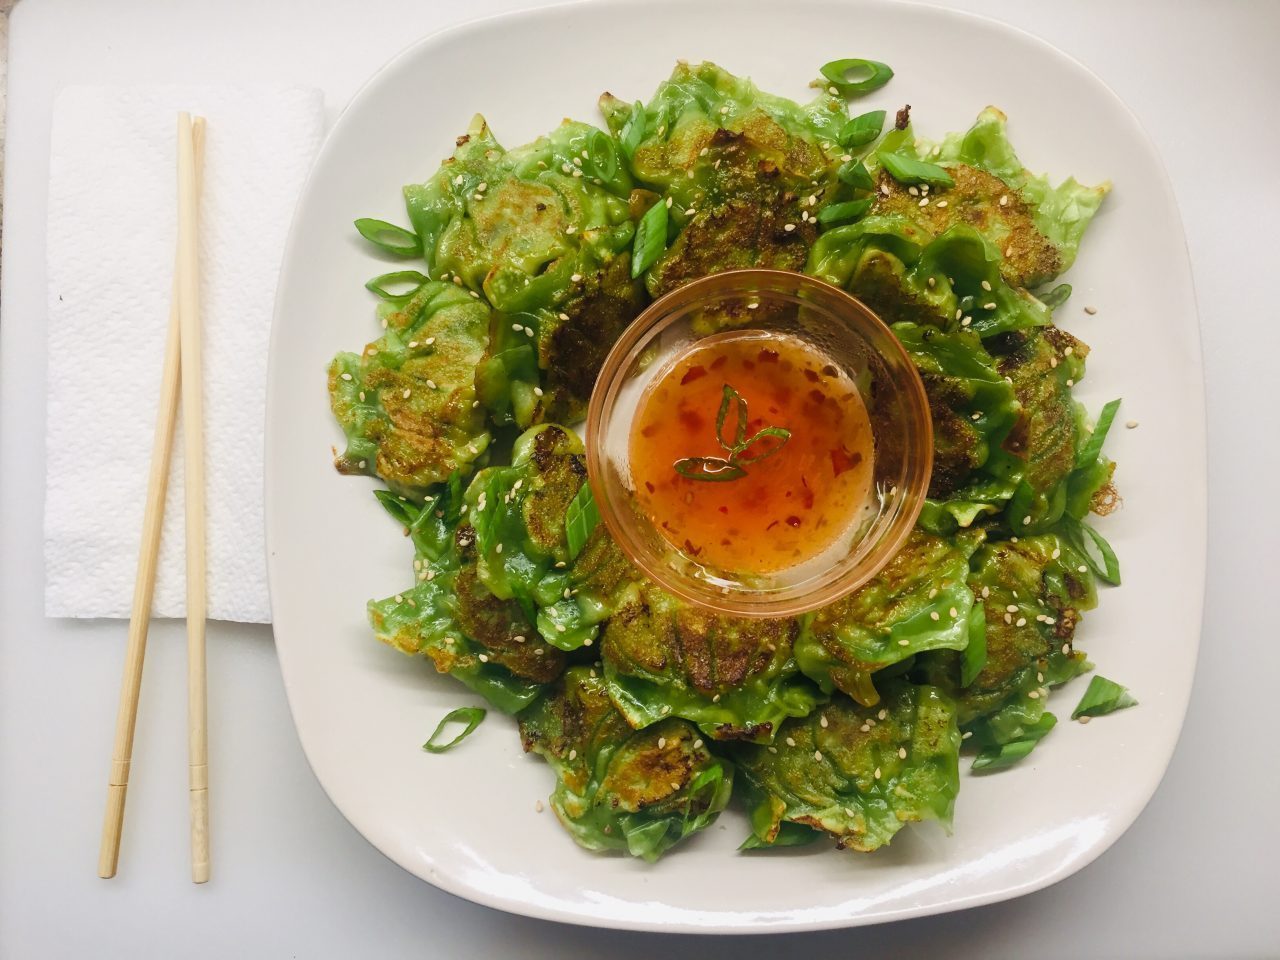
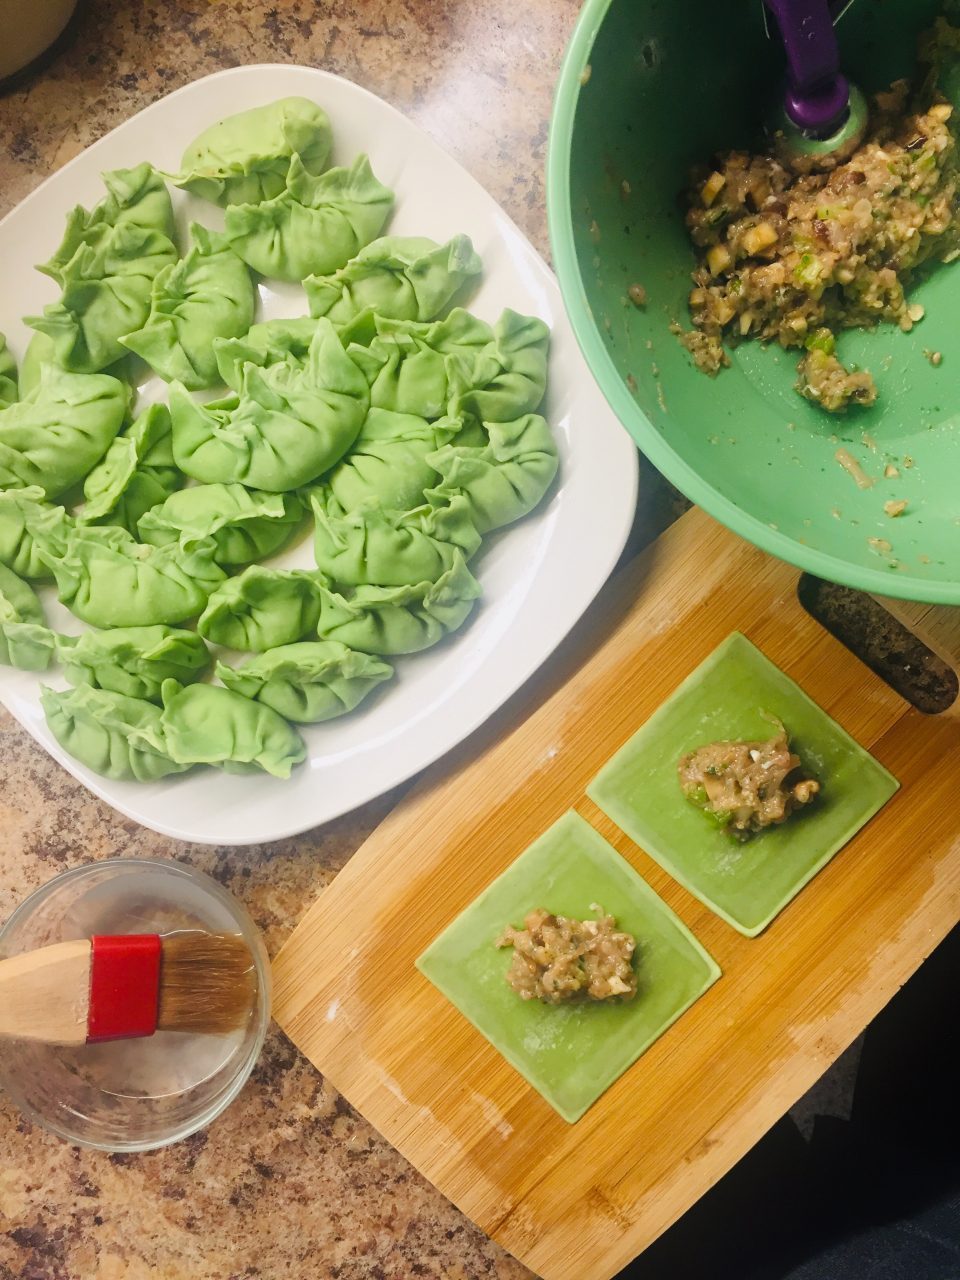
To assemble the dumplings, place wrappers on a wooden cutting board or any work surface. Spoon about 2 tsp of the chicken mixture into the center of each wrapper. Using a pastry brush, rub the edges of the wrappers with water. Fold the dough over the filling to create a half-moon shape, pinching the edges to seal and fold over edges over each other to create a fan-like design. Place on a large plate covered with towel so the potstickers don’t dry out. Continue wrapping until finished.
Heat 2 tablespoons of oil in a large skillet that has a fitted lid over medium heat. Working in batches, add potstickers in a single layer and cook until beginning to crisp on the bottom, about 2-3 minutes. Flip and fry for another minute. Working quickly, add 1/4 cup water; cover and cook until liquid has evaporated and dumplings are crisp and golden, about 2-4 minutes.
Serve immediately with Thai Sweet Chili Sauce for dipping.
*The filling in the potstickers does not have to be cooked prior to wrapping.
*To freeze, place uncooked potstickers in a single layer on a baking sheet overnight. Transfer to freezer bags.
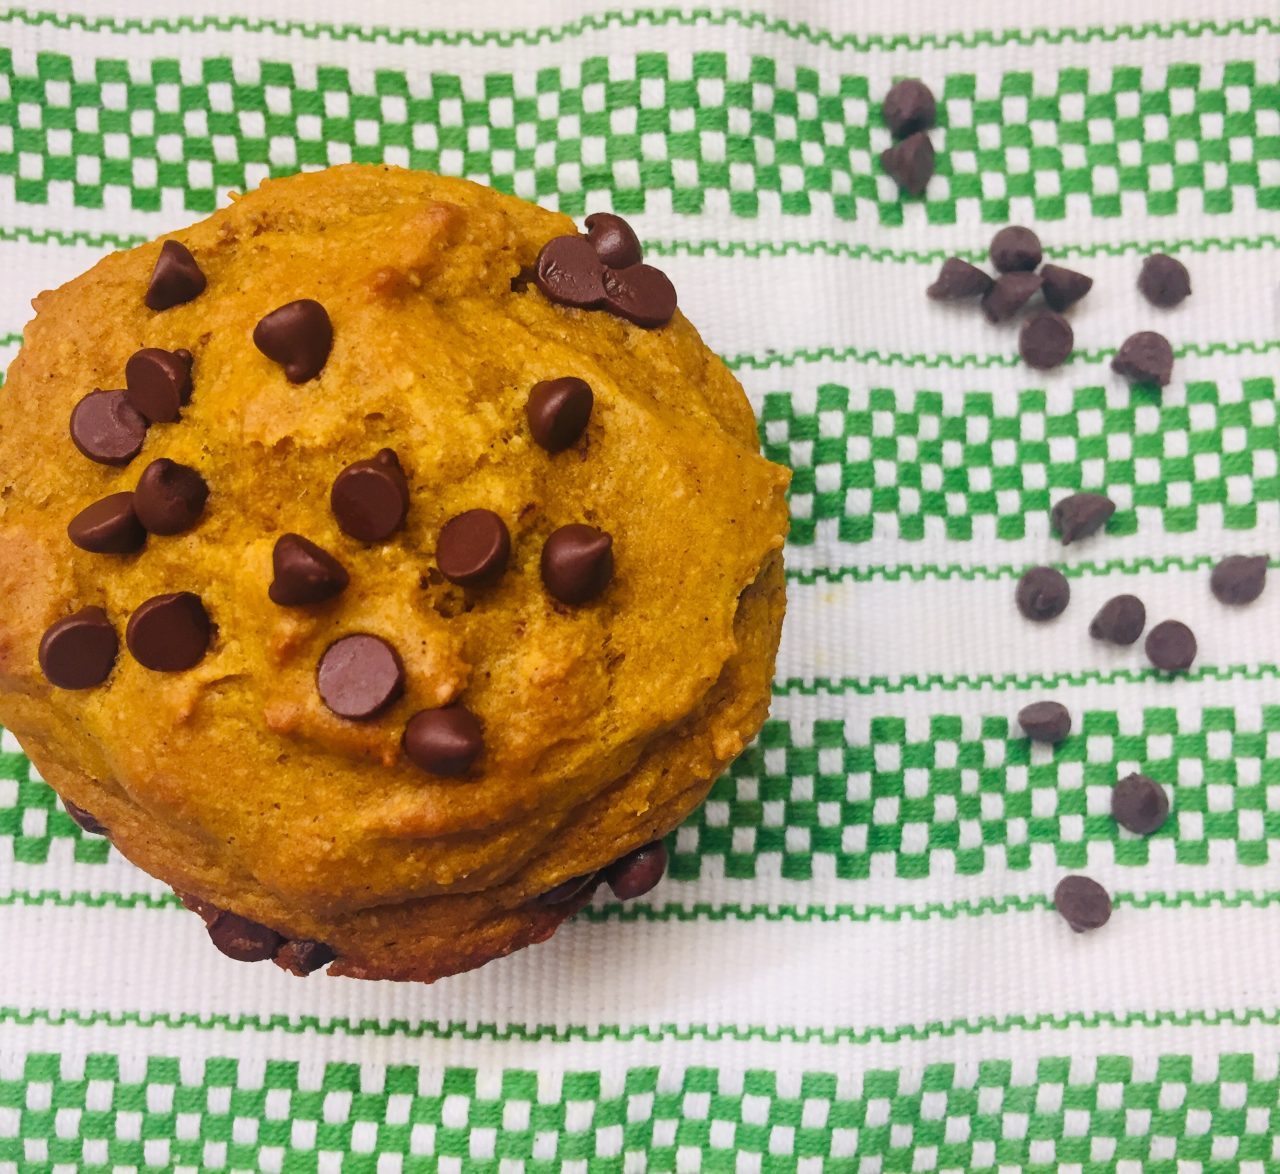
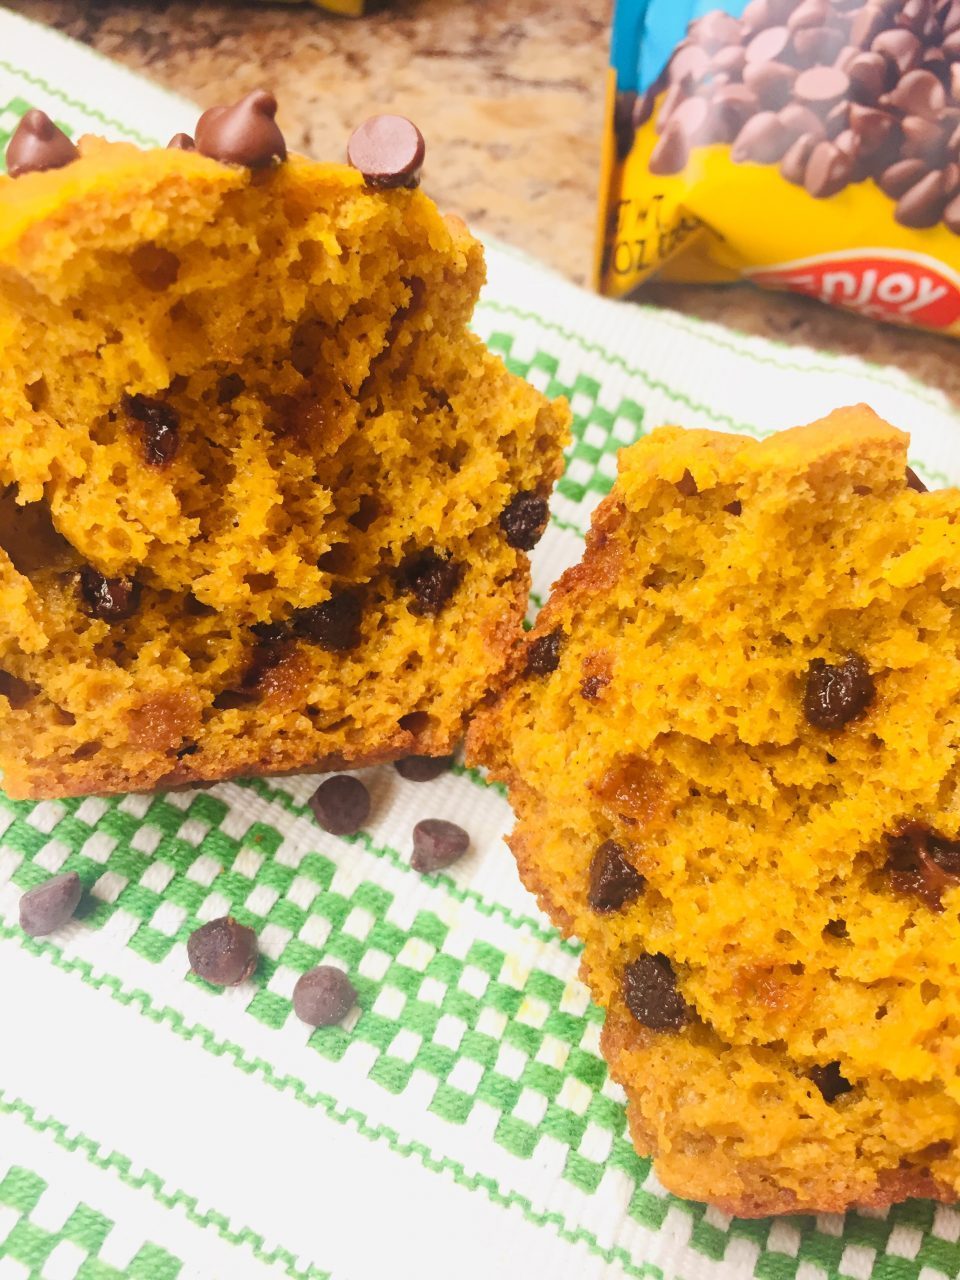
2 Cups Kodiak Cakes Power Protein Flapjack & Waffle mix
1 Can Organic Pumpkin Puree
1 Egg
1 tsp Vanilla Bean Paste or Extract
1 tsp baking soda
1-1/4 tsp Pumpkin Pie Spice
1/4 cup maple syrup or honey
1/4 cup coconut oil, melted
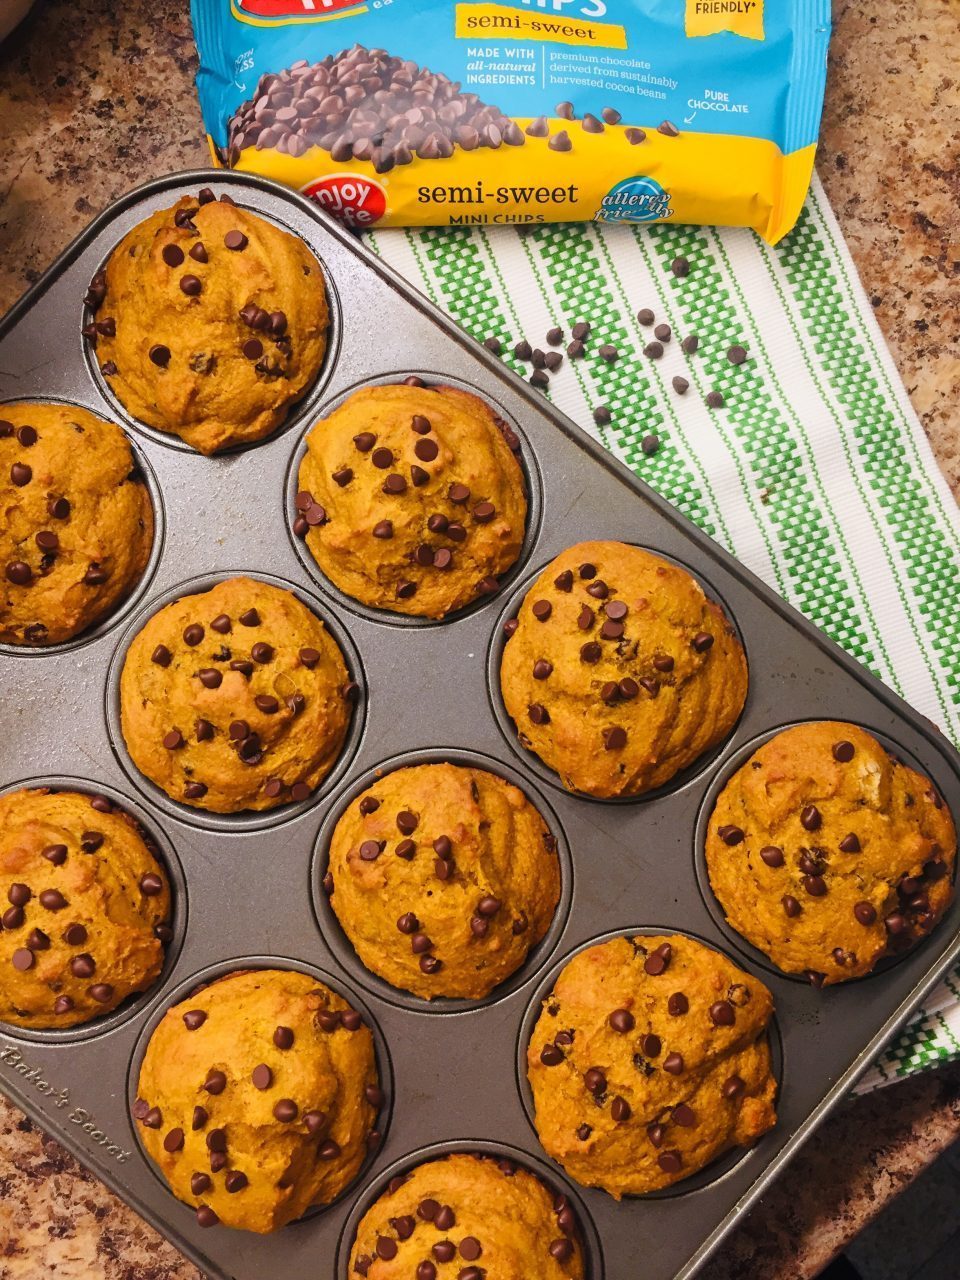
1/2 cup Mini Semi-Sweet Chocolate Chips
DIRECTIONS;
Heat oven to 350F.
In a mixing bowl, whisk together the kodiak cakes flour, baking soda and pumpkin pie pie. Add pumpkin, egg, vanilla, and maple syrup. Mix to combine. Stir in the oil until incorporated well. Stir in chocolate chips. Scoop evenly among muffin tins that have been sprayed well with baking spray.
Bake for 20-22 min or until tester comes out clean. Enjoy!